View/Edit the Assigned End User Details
You need OEM::Admin or OEM::Staff privileges to edit assigned end users in the dashboard. Click here for more information on Dashboard Roles/Privileges. Assigned end users are customers who purchased OEM devices from the selected Dealer company.
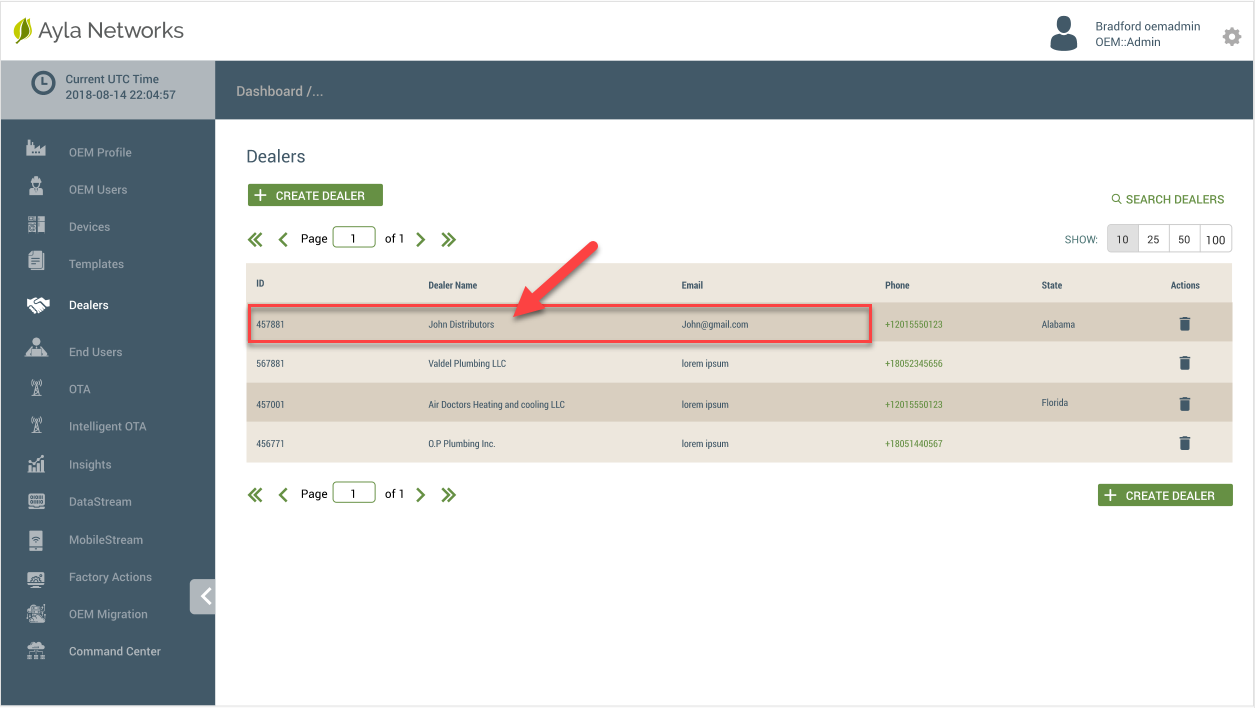
- On the Dealers page, click the Dealer whose end user's details you wish to view or edit.
- Click the Assigned End Users tab.
- Click the end user whose details you wish to view or edit. This opens the Details tab for the selected end user.
Notice there are six tabs (example shown below) of information for review and edit for the end user. Reviewing/editing capabilities on all tabs are covered in the remaining steps. Configurations pertaining to Dealers are in Steps m-r.

- If you wish to make changes to the end user's details, click the EDIT button.
- Edit the information on the Details tab as needed:
- For First Name, enter the first name of the user.
- For Last Name, enter the last name of the user.
- For Email, enter the user's email address.
- For Country Code, select the country code for the user's phone number.
- For Phone Number, enter the user's phone number that was used when creating the user account.
- For UUID (Universally Unique Identifier), review this alphanumeric ID that the system assigns the user; you cannot change this field.
- For Company, the company name associated with the user.
- For Street, City, State, Zip, and Country, enter this information for the user's address or location as needed.
- For Confirmed, select or deselect the check box depending on the confirmation status of the user's account.
- For Confirmation sent at, review the date and time that the confirmation email was sent to the user's account. This is not an editable field.
- For Approved, select or deselect the check box depending on the approval status of the user's account.
- For Origin OEM, review the original OEM entered. This field is not editable.
- For Assigned Dealer, select another Dealer in the drop-down list if you wish to change the Dealer assigned to this end user. Dealers are OEM customers who sell the OEM's devices to end users.
- For Automatically Assign all devices of this end user to the Assigned Dealer, select the checkbox if you wish to do this; otherwise, unselect it or leave it unselected. If you wish to select specific devices, leave this checkbox unselected, and select the specific devices using the Assigned Devices tab.
- For Roles, notice that it specifies the End User role, which is the role assigned when users sign up for an Ayla account.
- For Reset password, click the link and follow the prompts to reset the user's password.
- For Resend confirmation instructions, click the link and follow the prompts to resend the instructions to confirm the user's account.
- For Register Device, enter the DSN for the device, and then click the REGISTER button. If the device registers successfully, the following message flashes at the top of the page:

- For Add New Role, select the role you wish to assign to this end user.
- For Associate with, if this end user is a Dealer User or you wish to convert this end user to a Dealer User, select the Dealer you wish to assign to this end user if one is not already assigned. (See Step m above.) Dealers are OEM customers who sell the OEM's devices to end users. Dealer Users are employees of the Dealer.
Then, select the role you wish to assign to this Dealer User. This drop-down list provides OEM roles specific to the Dealer User. For example, Dealer Users need OEM::Staff privileges so that editing and other permissions are enabled in the Dealers management area of the dashboard. Click here for a description of the Dashboard Roles/Privileges.
- Click UPDATE to save the changes to this user's details, or CANCEL to close the dialog box without saving. Note that if you entered Dealer information (steps m-r above), this end user will appear in the Dealer Users tab (if this is an employee of the dealer) or the End Users tab (if this is an end user assigned to the Dealer). Click here for information on these tabs.
- Click the Metadata tab if you wish to review its content. (provides user details, such as key=Gender, value=male; key=Title, value=position; key=Age, value=20-30; key=Location, value=NY, key=2ndEmail, value=person@test.com; etc.) The content includes:
- Key - the type of data
- Value - the value for the metadata key
- Created at (UTC) - the date/time that the metadata key-value was created
- Updated at (UTC) - the date/time that the time metadata key-value was updated
- Actions - the Trash Can icon to delete the metadata
- Click the Shared By User tab to review details on the end user's shares. A share is when you share a given resource between registered users. Click here for more information about Shares.
- Shared ID - the Ayla-assigned ID of the device being shared.
- Grant ID - the ID of the customer granting use of the shared device
- User ID - the Ayla-assigned ID of the registered user authorized to share this device
- Resource ID - the property ID of the device
- Resource name - the name for the resource that is shared
- Created at (UTC) - the date/time that the share process was created
- Start (UTC) - the start date/time that the device is being shared
- End (UTC) - the date/time to end the share process
- Operation - the level of privilege given for the share operation
- Click the Contacts tab to review its content or edit a particular contact in the list. The content on the Contacts tab is as follows:
- Display Name - the name that you chose for this contact
- Firstname - the first name of the contact
- Lastname - the last name of the contact
- Actions - the Trash Can icon to delete the contact
You can click a contact in the table listing on the Contacts tab to review all details for that particular contact, such as details about user connections and deliver notification options. You can also create new contacts from this tab; click here for instructions. If editing a contact in the list, complete these steps:
- Click the contact in the table listing on the Contacts tab to open the Edit Contact dialog box.
- Click EDIT to change the dialog box to editing mode.
- Change the information as needed. Click here for descriptions of the fields for editing.
- Click UPDATE to save your changes and close the dialog box. The following message displays on the Contact page for the selected user upon a successful update to the contact's information.

- Click the Device tab to review the list of devices assigned to the end user. The information on this tab includes:
- ID - the Ayla-assigned ID for the device
- DSN - the OEM Device Serial Number
If you click the device in the list, the Device page opens, so that you can review and edit details and settings for the device.
- Click the Rules tab to review a table listing of rules. Rules are configured and managed in the Ayla Developer Portal. For more information on the information on rules available in the Ayla OEM Dashboard, click here. The information on the Rules tab include:
- Rule Name - the name of the End User rule
- Description - a description of the rule, entered by the End User
- Status - the status of the rule – enabled, disabled
- Actions - the Trash Can icon to delete the rule
- On the Rules tab, click the rule to open the Rule Detail dialog box. This dialog box provides the following information on rules:
- Rule Name - the name of the End User rule.
- Description - a description of the rule as entered by the End User.
- Created At - the date/time that the rule was created.
- Updated At - the date/time that the rule was updated.
- Status - the current status of the rule, which is either enabled or disabled.
- Condition If - the list of conditions that must be valid before the actions described in the "Action Then" field are executed.
- Action then - the list of actions that take place when specific conditions (described in the Condition If field) are met. This list provides the Name, Type, and Description of the action.
Please click here to let us know how we're doing. Thank you.